Learning the ropes can be quite costly when you are starting a new business, or even just trying out new advertising campaigns for something that is well-established. One mis-click or small mistake can lead to a ton of problems down the road.
It is important to take your time and work through each new setup carefully and thoughtfully.
To make the process easier, we put together this guide to help walk you through the ins and outs of setting up Facebook Business Manager and Ad accounts.
Setting up Facebook Business Manager
Setting up Facebook Business Manager can be done in just a few steps and shouldn’t take longer than a few minutes.
Here we will take you through each step of the process.
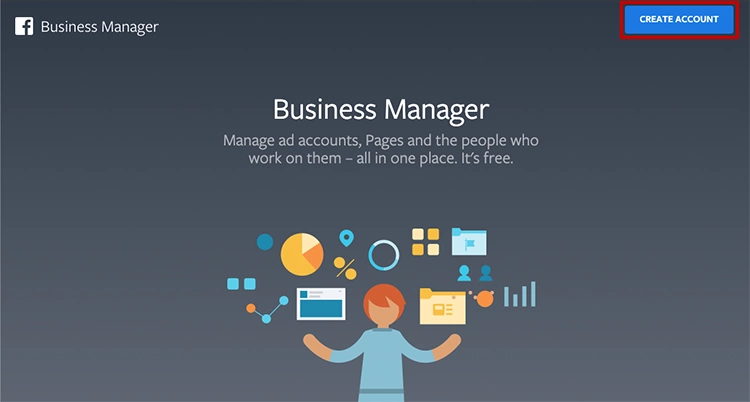
- To begin, go to the Business Manager home page and click Create Account.
*You’ll need to log in using the email and password you used to set up your personal Facebook profile.
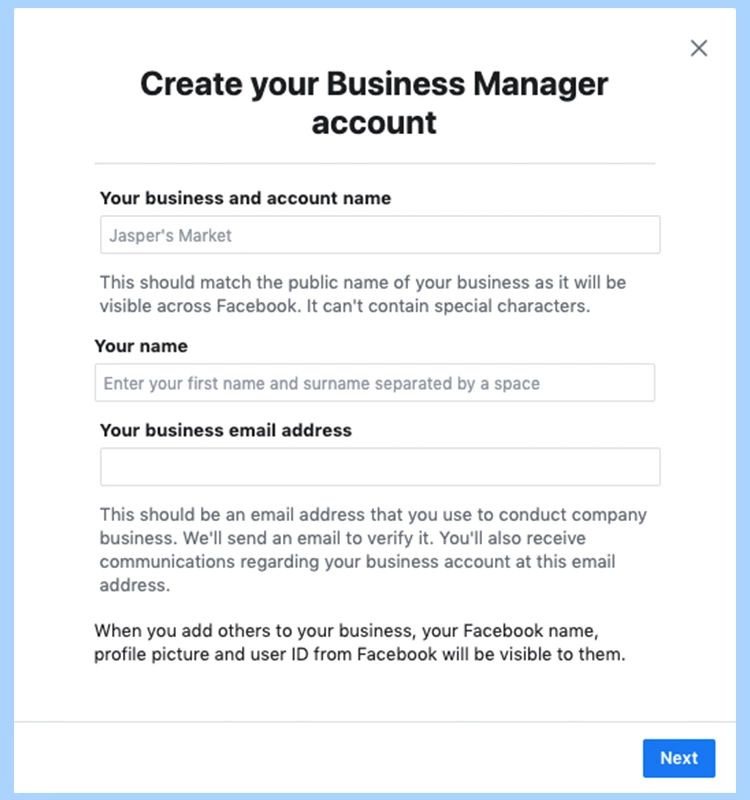
- Next, enter your business’s name, your name and email address to set up your Business Manager account.
After entering and double checking the information, click Next.
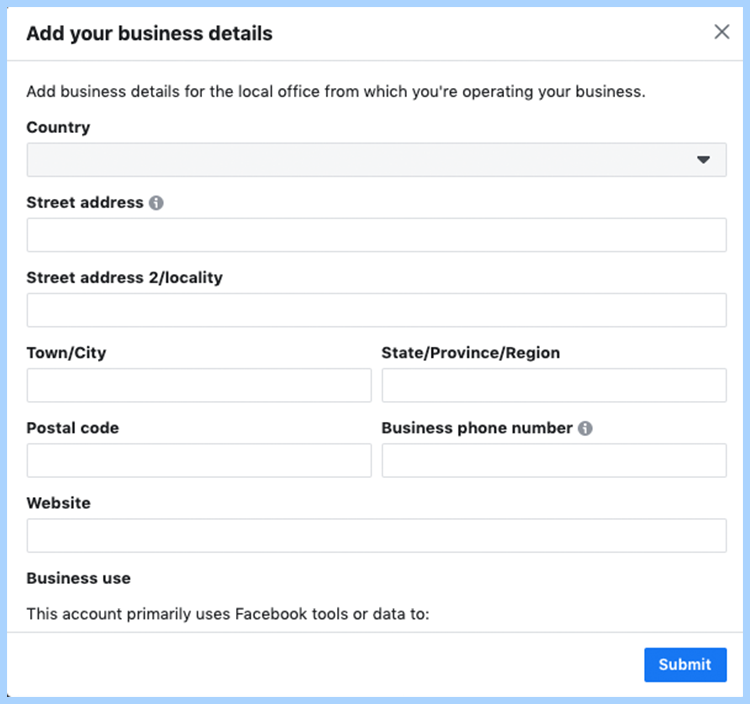
- The next page will ask you to enter your business’s details:
- Address
- Phone number
- Website
You’ll also need to specify whether you’ll use this Business Manager account to promote goods or services or to provide services to other businesses (like an agency).
Select promote your own goods or services and click Submit.
- You will now need to check your email for a message with the subject line “Confirm your business email.”
- Once you receive the email, open it up and click Confirm Now.
- Your Facebook Business Manager is set up and can be found through this link: https://business.facebook.com.
Setting up Facebook page
If you want to advertise you will have to have a Facebook page connected to your business account.
- On the Business Manager home page, select your business. Under “Business tools” choose “Business settings”.
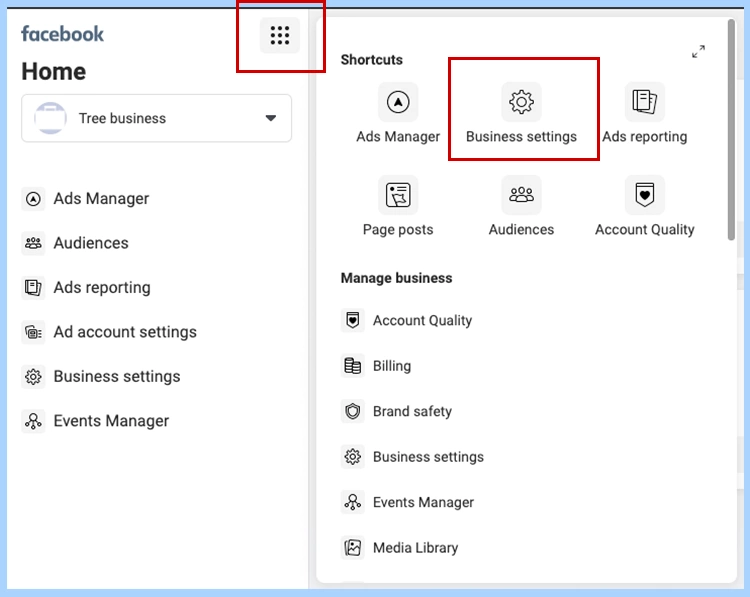
- In the next window, click Pages under “Accounts”. Click Add and select Add a Page.
* You should select Create a New Page if you do not have a separate Facebook page for your business.
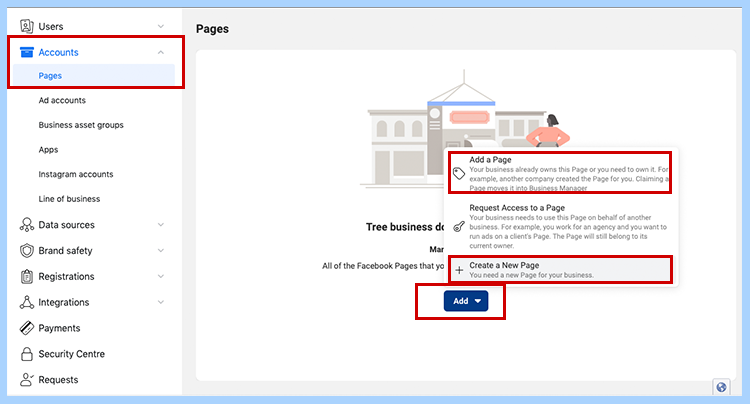
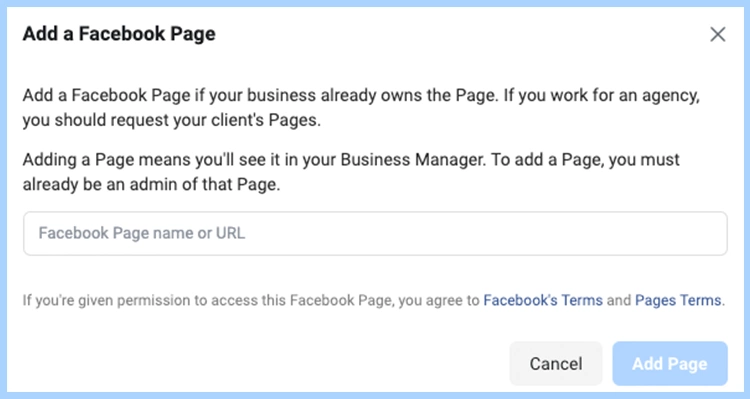
Add a page that you own
- Begin typing the name of your Facebook business page or URL in the text box and your business page name should autocomplete below the text box.
- Click on your business page.
- Then click Add Page. If you have administrator access to the page you’re trying to add, your request will be approved automatically.
Create a new page
If you selected Create a New Page, you will have to go through the steps of creating a new page. Here’s what you’ll need to set up a new Facebook Page:
- Your business’s name
- A description of your business
- A profile photo
- A cover photo
Creating a Facebook Ads account
In order to run ads on Facebook, you will also have to have a Facebook Ad Account.
Let’s take a closer look at the steps needed to set up a Facebook ad account.
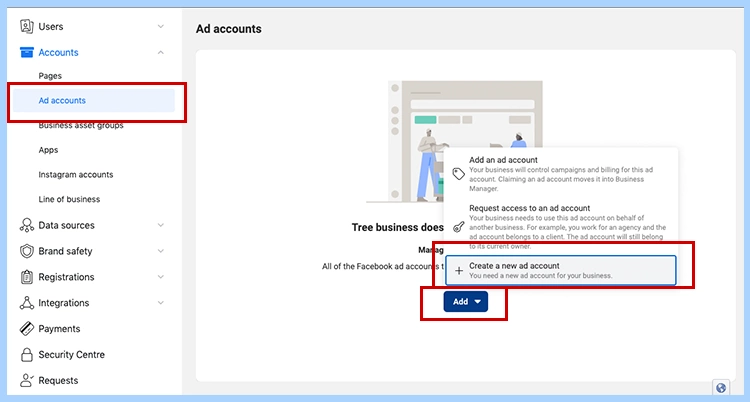
- On the Business Manager home page, select your business. Under “Business tools” choose “Business settings”.
- In the next window, click Ad accounts under “Accounts”. Click Add and select Create a new ad account.
- When creating a new ad account, use your business name when asked to name your new account. This name won’t appear publicly but it will help you and any employees you add to the account easily identify it.
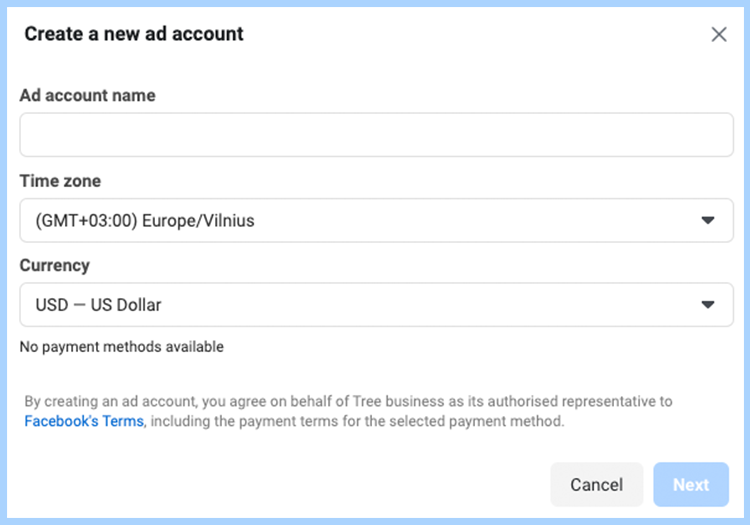
- Now select the option for My business, when you are asked to identify who this account will be used for.
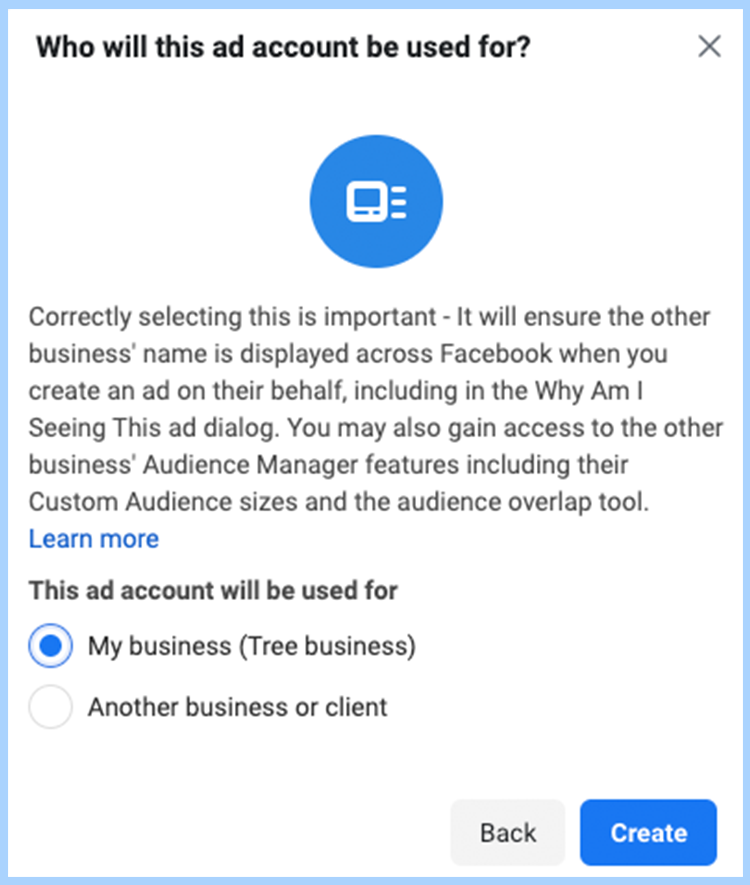
- When you’re done, click Create and you will now be able to start advertising!
Once you finish creating your Business Manager and Ad Accounts, you can connect your new Facebook business manager and start running campaigns on Facebook directly from the Sixads app.


